


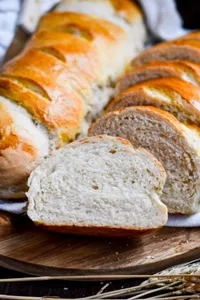
Our Challah Bread Recipe is a sweetly delightful loaf to make at home and all the more decadent when it’s baked fresh in your own oven! Challah bread is a staple at Jewish high holidays and the rest of us love to celebrate with it too! It’s simple to make at home and the real beauty of the challah loaf shines through in it’s braiding. Challah dough is soft but pliable, so it’s perfect to braid. You can keep it simple by braiding with 3 strands or make it even more magical by braiding with 4 or 6 strands!


History of the Challah Bread Loaf
The Challah loaf is loved all around the world for it’s yellow, sweet, and deliciously soft center.
The term challah originally referred to a kind of cake, but in Rabbinic Hebrew it refers to the mitzvah of separating a portion of the dough before braiding. This portion of dough is set aside as a tithe for the Kohen.
In Hebrew, this commandment is called hafrashat challah, or “separating challah”. Challah loaves are typically covered with a fancy cloth—one reason is that it is symbolic of the dew that fell on the manna in the desert.
For Rosh Hashanah, the Jewish New Year, challah loaves are made in a circular or spiral shape for various symbolic reasons—depending on whom you ask, the round shape represents continuity, the wheel of the seasons, or a spiral of upward progress.


Tips for 4-strand and 6-strand Challah Bread Braids
Making a 4-Stranded Challah Braid
• Divide the dough into four pieces, and shape each piece into a rough 6″ log. Cover the logs with lightly greased plastic wrap, and let rest for 10 minutes.
• Roll each log into a 15″ rope. Cover, and let rest for 10 minutes.
• Continue rolling the ropes until they’re about 20″ long; they’ll shrink back to about 18″ as they sit.
• Lay the strands parallel to one another, and pinch the ends on your left together.
• Take the rope nearest you, and move it up over the next two adjoining ropes.
• Next, move the rope back under the rope next to it. Fan the ends of the ropes out again.
• Repeat the process, starting with the rope farthest away from you. Bring it down and across the next two adjoining ropes, and then back under the rope nearest it.
• Continue in this fashion, alternating which side you begin with until you’ve braided the whole loaf.
• Pinch the loose ends together, and tuck them underneath the loaf.


Making a 6-Stranded Challah Braid:
• The way to braid a 6-strand is to repeat “over two, under one, over two.” Carry the right-most rope over the two ropes beside it, slip it under the middle rope, and then carry it over the last two ropes. Lay the rope down parallel to the other ropes; it is now the furthest-left strand. Repeat this pattern until you reach the end of the loaf. Try to make your braid as tight as possible. Your braid will start listing to the left as you go; it’s ok to lift it up and recenter the loaf if you need to. Once you reach the end, squeeze the ends of the ropes together and tuck them under the loaf.
• At this point, your loaf is long and skinny. If you’d like to make a celebration ring, stretch the loaf a little longer and pull the ends toward each other to create a circle. You can either squeeze the ends together or braid them into a continuous circle.
• If you’re making a regular loaf, you need to “plump” it a little to tighten the ropes into more of a loaf shape. Place your left palm at the end of the braid and your right palm at the top, and gently push the two ends toward each other, just like plumping a pillow in slow motion. Then slip your fingers under the dough along either side and gently lift the dough while cupping it downwards.
• Remember that it doesn’t have to be perfect! Even with a few flaws in the braiding, it will never be seen once it’s baked!
For more tips click here: The Kitchn
Challah Bread Recipe


Challah Bread Recipe is as delightful as it is beautiful! Challah bread is a staple at Jewish high holidays and the rest of love to celebrate with it too!
Ingredients
- Dough
- 1/2 cup (113g) lukewarm water
- 6 tablespoons (74g) vegetable oil
- 1/4 cup (85g) honey
- 2 large eggs
- 4 cups (482g) King Arthur Unbleached All-Purpose Flour
- 1 1/2 teaspoons salt
- 1 tablespoon instant yeast
- Glaze
- 1 large egg, beaten with 1 tablespoon cold water
Instructions
- To make the dough: Weigh your flour; or measure it by gently spooning it into a cup, then sweeping off any excess.
- Combine all of the dough ingredients and mix and knead them, by hand, mixer, or bread machine, until you have a soft, smooth dough.
- Allow the dough to rise in a plastic wrap-covered bowl for about 2 hours, or until it's puffy; it won't necessarily double in bulk.
- Gently deflate the dough, and transfer it to a lightly greased work surface.
- Next step: divide the dough into pieces, the number depending on what kind of braid you want to make.
- Once you've decided which braid you're doing, divide the dough into the appropriate number of pieces. Roll each piece into a rope about 20" long. If the dough starts to shrink back as you roll, cover it and let it rest for about 10 minutes, then resume rolling. The short rest gives the gluten a chance to relax.
- Braid the loaf. Remember, for three- or six-strand braids
- Gently pick up the braided loaf, and place it on a lightly greased or parchment-lined baking sheet.
- Cover the loaf with lightly greased plastic wrap, and let it rise until it's very puffy, 90 minutes to 2 hours at cool room temperature. Towards the end of the rising time, preheat the oven to 375°F.
- To make the glaze: Whisk together the egg and water. Brush the glaze over the risen loaf.
- Place the baking sheet atop another baking sheet; this will insulate the bread's bottom crust, and keep it from browning too much. Put the challah in the lower third of the oven, and bake it for 20 minutes. If it's a deep golden brown, tent it loosely with aluminum foil. If it's not as brown as you like, check it again at 30 minutes.
- Once you've tented the challah, bake it for an additional 10 to 15 minutes, until the loaf looks and feels set and its interior registers at least 190°F.
- Remove the bread from the oven, and place it on a rack to cool.
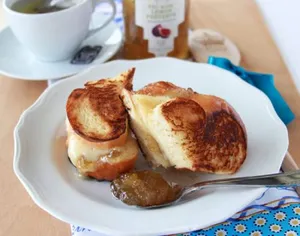
- Store any leftover bread, well wrapped in plastic, at room temperature for several days; freeze for longer storage. While challah does tend to dry out after a day or so, it's always good toasted, or made into grilled sandwiches or French toast.
Nutrition Information:
Yield:
16Serving Size:
1Amount Per Serving: Calories: 162Total Fat: 10gSaturated Fat: 2gTrans Fat: 0gUnsaturated Fat: 7gCholesterol: 35mgSodium: 271mgCarbohydrates: 15gFiber: 1gSugar: 2gProtein: 3g


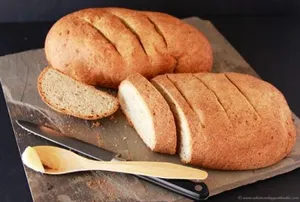
Enjoy some of these other homemade bread recipes!
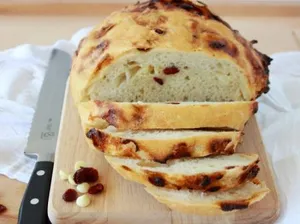
• No-Knead Artisan Loaf Recipe
• Whole Wheat and Cinnamon Brioche Loaf
We hope you enjoy our Challah Bread Recipe this holiday season!
One more thing before you go…
We love creating recipes and sharing our adventures with you, so if you can do us a huge favor it’d really support us! It’s easier to stay motivated to share our best with you when we hear from you! We adore our readers and it really makes our day to get comments, social tags/shares, or pins that you save for later to share with your family and friends.
Our hearts sing when you do.
We SEE you and we do our very best to respond to all the love! It also amps up our mo-jo so we get lots of awesome things done around here. Please reach out if you have questions or comments via our email: ruthie@cookingwithruthie.com. We’re excited to see you again soon!
Cooking with Ruthie on Instagram
Cooking with Ruthie on Pinterest
Cooking with Ruthie on Facebook
Thanks for sharing in the CWR blog-love!
Love Always,
Ruthie & Madeliene
Recommended Posts


Chef Ruthie
Owners at Cooking With Ruthie
- Japanese Green Tea Ice Cream Recipe
- Patriotic Fruit and Cheese Kabobs Recipe
- J’ADORE cookbook on FOX13
- Sweet & Spicy Candied Pecans Recipe
- Grilled Pineapple Chipotle BBQ Sauce Recipe
- Braised Tri-Tips Recipe
- Blueberry Lemon Mastiha Cocktail Recipe
- French Endive Salad & Louvre Museum
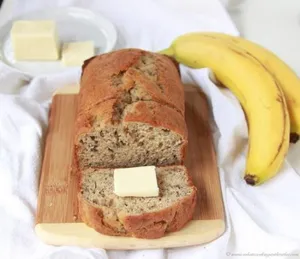
- Sourdough Chocolate Chip Banana Bread Recipe
- French Crème Fraîche Recipe
- Caprese Garlic Bread
- Chicken Fricassee Recipe
Leave a comment