How our garden grows
Week 10
So, we finally completed our new Raspberry Bed and Pathway– just in time for hosting my friend’s wedding last Saturday 🙂
In How our garden grows… (week 8) we walked you through how to build a raised garden bed! And in this post we’ll show you how we finished up the bed and our tricky little Patio Paver Pathway…


This is the before photo of the spot in our yard that we picked to transform… you can see the grass didn’t do well here, but the weeds did!


Future Raspberry Bed
We left off in week 8 with an empty bed that needed sprinklers… we just tapped off our sprinkler box that was already in place in that area!


Tapped off the sprinkler line that runs in front of our new bed
Then we filled our new garden bed with compost and some of the dirt that was dug out in order to place the bed. We mixed them together as we filled the bed so that our new raspberries will be happy in their new home 🙂


Filling the new garden bed with dirt and compost
We had to look long and hard to find a specific type of raspberry bush called, “Caroline”. Carolines are very hardy, resistant to disease, and they’re ever-bearing! We did some research and Carolines are an improved version of the Heritage Raspberries. We were finally able to locate some, but they were Bare Root Raspberry Starts, which is why they’re all in a bag!


Bare Root Raspberry Starts
When planting raspberry bushes, space them in rows at least 12 inches apart and 36 inches between each row…


Bare Root Raspberry Start
When planting a Bare Root bush it’s best to use a root stimulator to help them take root and be super happy 🙂


Root Stimulator
NOW, our new bed is built and in it’s place, has sprinkler to it, is filled with dirt, AND plants… all we have to do is figure out how to finish off our beautiful little Raspberry Bed area!
AND we’re off to the home improvement store to see what we can find… Our pathway area is a little tricky because it’s on a slope with a rock wall on the bottom side… it took some creative maneuvering BUT, we got ‘er done!
We bought three sizes of Patio Pavers for our pathway…


We bought 3 sizes of patio pavers
We needed seven of the largest Pavers to build our step…


7 of the largest pavers to build the step
This is a lovely photo of Ruthie trying to pull our super heavy cart!!


Ruthie at Home Depot
We also had to buy 4 bags of Paver Sand, Patio Paver Base, some landscaping material, and the edge trim piece too!!
First thing to do, is to lower the elevation of the area by three inches and make it as level as possible…


Lower the area by three inches and level
Then lay out the landscaping material, pour Paver Base on top, and level with a rake!


Lay out landscaping material, pour patio paver base onto and rake level
The next layer is the Paver Sand, pour on top, and level the best you can… we used a board to help with leveling!


Pour out paver sand


Level with a board and here you can see the large stones for our step
SO… now we had to decide on a pattern to incorporate through out the pathway, it was tricky because of the odd shape and angles but, we continued the pattern through the whole area 🙂


Our patio paver pattern
We started against the straight of the board and worked our way out…


Starting at the straight edge and working our way out
We had to take out the tile saw for cutting the pavers to fit our crazy little area… most patio paver jobs are probably not this tricky!!


Marking where to cut


Cutting paver with tile saw
Once the top level tiles were in place we poured on additional sand and swept it in between the pavers filling in all the open cracks…


Pour additional sand onto pavers and fill in all the cracks
Then we had to figure out a solution for the lower level of the pathway, where the rock wall didn’t have a ledge to place the pavers against (otherwise they’d eventually fall off)… our solution took a lot of Liquid Nails!!


We built a ledge with Liquid Nails and then covered it with sand to disguise the glue


Applying Liquid Nails, smooth with gloved finger, and cover with sand to disguise glue!
We built our own ledge and finished off the project! To finish off the top of the pathway we filled in one side with Pavers and the other side we planted Zeriscape plants! We’re super happy with the end result! Such an amazing improvement for that area of our yard AND we’ll have delicious raspberries in a couple of years too 🙂


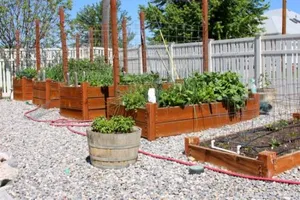
Thanks for joining us for How our garden grows… on this DIY Raspberry Garden Bed and Pathway post! Hopefully you’ve gotten some helpful tips if you’re looking to build a garden bed or use Patio Pavers to finish off an area!! AND if you’re wondering about the tomato cages, they’re just to keep our dogs out 🙂
Love,
Ruthie
Recommended Posts


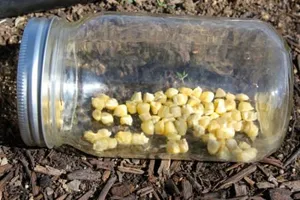
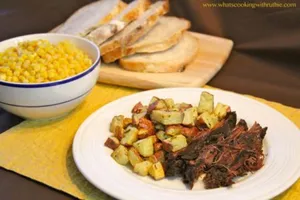


[…] bit different. This is our sweet and tasty corn waiting to be boiled… Remember our Raspberry Bed and Pathway that we put in back in week 10? Well, if you notice in the picture the two innocent looking plants […]
[…] How our garden grows… (week 10) […]
Yeah, that’ll be nice. I’m gonna have to come see it in person! : )
Looks beautiful!
Thanks, Carol… it’s also great that the dogs don’t get muddy over there any more 🙂