Today we have one of our NEW Contributors sharing with us. I’m excited to introduce you to McKenzie from Girl loves Glam!
 I met McKenzie at a blogging conference a year ago and just think she’s the sweetest little thing. I’m SO thrilled that she’s on our Creative Team and we’ll get to have her visit every month! AND with that… I’ll let her take it from here:
I am McKenzie from Girl Loves Glam, and I am so excited to share this tutorial with you today!
I have a little secret/confession to make.
I have known how to make this flower for many years now, but I wasn’t quite ready to share my secret until now!
You are probably wondering why.
My answer?
It was my secret weapon in my Etsy shop! These flowers were SO popular and I didn’t see anyone else with similar ones out there!
Now that I have decided to close my Etsy shop, I am ready to share my secrets with you!
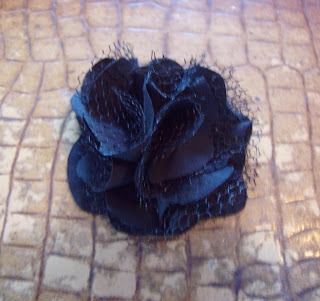
You are going to learn how to make this adorable satin ribbon flower!


To make one of your own, you need…
*Satin ribbon- Any size works! Thicker ribbon makes bigger flowers, thinner ribbon makes smaller flowers
*Needle
*Thread
*Beads or buttons to put in the center


The lengths that I will be using in this tutorial will be for the 1 1/2 inch thick satin ribbon. They can easily be adjusted for the other ribbon sizes. All lengths that I use are estimates.
First, you want to thread your needle and tie a knot in the end. Fold the ribbon over about 3-4 inches creating what is close to a 45 degree angle (see second picture). Repeat this step going the opposite direction and fold over behind your previous fold. Hold it into place and sew the middle pieces into place (see third picture). Flip the entire flower over so that the long piece you are working with is on the top. Fold that piece over again like you did in the first two steps, bringing the ribbon across the center of the flower. Sew that piece in place (see fourth picture). Pinch ribbon together close to the spot where the thread is sewn through and sew that piece down (see fifth picture). Continue ruffling the ribbon around the center of the flower, sewing the ruffles into place as you go (see sixth picture). Sew ruffles all the way around the flower until you have made a full circle (see seventh picture). Cut off excess ribbon, leaving about an inch left. Fold remaining ribbon in half and sew onto the center of the flower (see eighth picture). Sew buttons or beads in the center (see ninth picture).

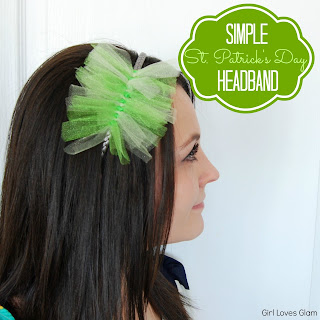
The great thing about these flowers, is that they can be customized in so many ways! They can be big or small. They can have a button in the center or beads, they can be put on a pin, a clip, or a headband. They can even have feathers added to them! They really can be transformed! I love making these flowers. Once you make a few, it comes really easily too!
Come see my other flower tutorial and hair accessory tutorial too!

 Dollar Store Tulip Doily Garland

DIY Washi Tape Curvy Oval Frame

How to make a simple Infinity Scarf


[…] 8, 2013 By McKenzie Leave a Comment This post was seen first on What’s Cooking with Ruthie I am so excited to share this tutorial with you today! I have a little secret/confession to make. […]